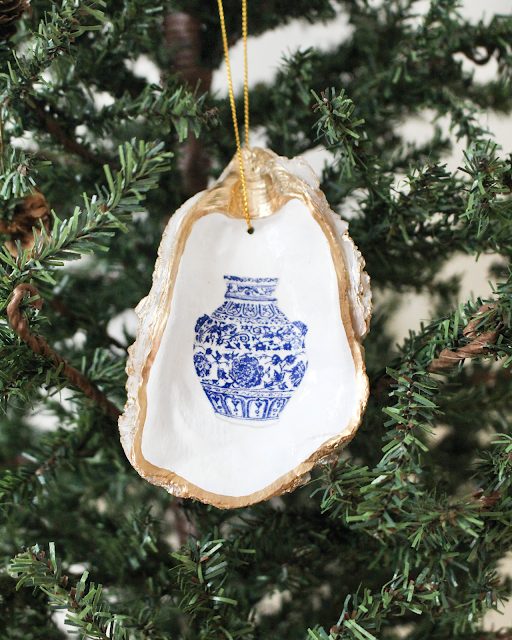
Eep!! I'm so happy to finally be sharing this DIY!! Over the summer I started making these shell jewelry dishes for fun, friends, and now for a little side biz. BUT I wanted to share how to make them in case anyone else would like to try their hand at this craft... sharing is caring, right?
They are totally customizable and unique. Thankfully they're pretty straight forward to make, as well! For those that prefer video and audio for instructions, feel free to swing by my YouTube channel for the play by play. Without further ado, below are the materials and steps:
MATERIALS (Affiliate Links)
Ornament Supplies:
Other Napkin Designs:
STEPS
1. Begin by painting the inside of the shell white. This will even out the coloring of the shell for larger designs spanning the entire shell or provide a crisp backdrop for smaller designs, like the ginger jars. Let dry.
2. Cut out the desired design either to a bit bigger than the shell if covering the entire inside, or precisely around it, like the jars. Trim excess paper off. Typically there are several layers to paper napkins, so peel off the top layer with the design.
3. Apply a thin coat of mod podge to the inside of the shell and place the design down tapping away any air bubbles. Be sure to avoid any sort of brushing or stroking movements, as it will likely rip the paper. Apply a more generous layer of mod podge on top of the design in a stippling motion. If the inside of the shell isn't full covered with paper, gently brush the remaining surface with the gloss mod podge for a uniform finish. Let dry. Gently tear away any excess paper to designs covering the entire inside of the shell and glue down any frayed edges.
4. Paint on the gold leaf paint to the top and edge of the oyster shell. For added detail, lightly brush additional flecks of gold to the various ridges on the sides and back of the shell. Let dry.
ADDITIONAL STEPS FOR THE ORNAMENT
1. With a drill and a small drill bit (size will depend on thickness of string used) drill through the shell towards the top, either where the joint was or below the thickest part, as depicted in the video and photo.
2. Add string!
Just like that, ya have an adorable custom made jewelry dish or ornament. How cute?!
Sincerely,
Molly
Bloglovin' | Instagram | Pinterest | YouTube | TikTok


0 comments